
After some of my recent posts in the past months about how I digitally play around with rough sketches in order to finalize compositions, I've had some people asking how I then transfer the composite sketch onto the painting surface, especially for large images.
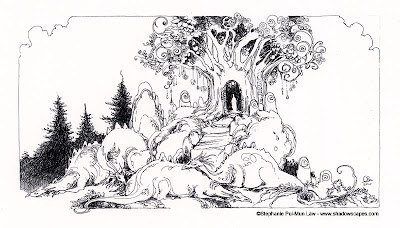 For this particular piece I'm actually using one of the ink drawings I did for the upcoming Minor Arcana book. I didn't have to do any digital tweaking of composition, however since I want to paint this at about 10x20 inches (and the original ink sketch is 5x10 inches), I resized it in Photoshop.
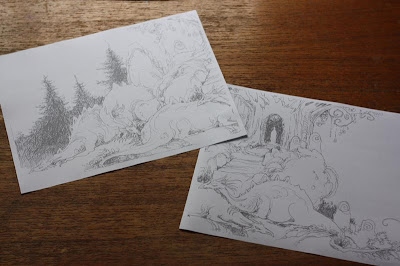 After resizing, I printed it out onto a couple sheets of paper (since it won't fit onto one sheet). Most of the time I flip the image horizontally first so that the final drawing will be oriented correctly, but I forgot to do it this time, and unless it's necessary for the image, like a musician being left handed if I forget to flip (I had flautists berate me once with a piece that I forgot to flip!), or needing to be oriented a specific way to fit the graphic design of a book/game/whatever, I don't generally worry about it too much. This is just a personal piece not meant for publication so I don't really care which way it faces.
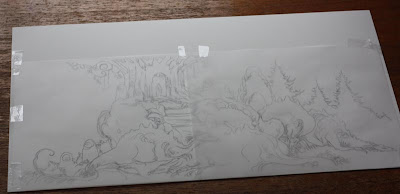
I placed sheets of tracing paper over these printouts and sketched in pencil. Frequently my initial sketches are extremely rough. Not so much in this example since I started from a finished ink drawing. But with a rough sketch, this phase is very good for me to start refining the details. The translucence of the tracing paper allows me to see enough of the initial drawing, but also gives me some opacity to make changes - like details, or fixing anatomy, or giving character to faces.
For this piece, I focus on simplifying to get rid of all the extra ink lines of shading because I need this to be prepped for painting. So on the one hand I'm getting rid of some of the detail from the initial drawing, and on the other I'm adding things as well because this is now twice as large!
Once I finish, I take the tracing paper and tape the pages pencil side down onto the final 20x10 inch Strathmore lightweight illustration board (series 500).
 Using my thumbnail I burnish across all the pencil lines. This transfers the graphite from the tracing paper onto the illustration board, like carbon paper.
 And speaking of carbon paper, if this method sounds far too tedious for you, that is an option as well. You can buy graphite carbon paper at most art stores. After printing out your modified sketch, you would just place the carbon paper between your printouts and your final surface, and trace over all your lines. I like the method I'm describing to you here instead though because it gives me a chance to reevaluate my composition with each iteration.
 After removing the taped tracing paper you can see the image has been transferred to the illustration board. Some places I didn't press hard enough with my pencil and so it's a bit light.
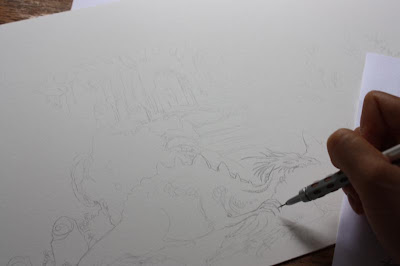 I go back in and darken and further refine the sketch directly on the illustration board. You can see the piece of paper I keep under my drawing hand as well to avoid smearing the drawing as I work.
 For this particular piece I'm actually using one of the ink drawings I did for the upcoming Minor Arcana book. I didn't have to do any digital tweaking of composition, however since I want to paint this at about 10x20 inches (and the original ink sketch is 5x10 inches), I resized it in Photoshop.
 After resizing, I printed it out onto a couple sheets of paper (since it won't fit onto one sheet). Most of the time I flip the image horizontally first so that the final drawing will be oriented correctly, but I forgot to do it this time, and unless it's necessary for the image, like a musician being left handed if I forget to flip (I had flautists berate me once with a piece that I forgot to flip!), or needing to be oriented a specific way to fit the graphic design of a book/game/whatever, I don't generally worry about it too much. This is just a personal piece not meant for publication so I don't really care which way it faces.
I placed sheets of tracing paper over these printouts and sketched in pencil. Frequently my initial sketches are extremely rough. Not so much in this example since I started from a finished ink drawing. But with a rough sketch, this phase is very good for me to start refining the details. The translucence of the tracing paper allows me to see enough of the initial drawing, but also gives me some opacity to make changes - like details, or fixing anatomy, or giving character to faces.
For this piece, I focus on simplifying to get rid of all the extra ink lines of shading because I need this to be prepped for painting. So on the one hand I'm getting rid of some of the detail from the initial drawing, and on the other I'm adding things as well because this is now twice as large!
Once I finish, I take the tracing paper and tape the pages pencil side down onto the final 20x10 inch Strathmore lightweight illustration board (series 500).
 Using my thumbnail I burnish across all the pencil lines. This transfers the graphite from the tracing paper onto the illustration board, like carbon paper.
 And speaking of carbon paper, if this method sounds far too tedious for you, that is an option as well. You can buy graphite carbon paper at most art stores. After printing out your modified sketch, you would just place the carbon paper between your printouts and your final surface, and trace over all your lines. I like the method I'm describing to you here instead though because it gives me a chance to reevaluate my composition with each iteration.
 After removing the taped tracing paper you can see the image has been transferred to the illustration board. Some places I didn't press hard enough with my pencil and so it's a bit light.
 I go back in and darken and further refine the sketch directly on the illustration board. You can see the piece of paper I keep under my drawing hand as well to avoid smearing the drawing as I work.
Thank you so much for this tutorial. It will come in handy when I progress from graphite to colors!
ReplyDeleteAw! So that's how you do it! Steph, beautiful as always. It's gonna be wonderful painting.
ReplyDeleteYou'd make a great teacher, by the way.
I get all nervous up in front of people James! I tried it once. I prefer written teaching. :)
ReplyDeleteReally, Steph? Just picture the class all naked and then you'll be able to teach with no nervousness.
ReplyDeleteEhi Stephanie... I'm basically one of your students, I'm following the advises about watercolors on your book and somtimes on the blog and wonderful images are coming out ;) I also have your new tarots :) I've waited a long time for them and I can tell I was worth to wait...they're great :) Thank you so much :) I hope one day we'll meet
ReplyDeleteThank you Stephanie for sharing your techniques with all of us! The painting is gorgeous! I can't wait for the new book to come out.
ReplyDeleteAnd teaching, I certainly understand the nerves thing!
Thank you so much for this, Stephanie!
ReplyDeleteI have drawn all my life, and painted in acrylic for a dozen years, but I have JUST begun to pick up watercolor— and am loving it!
This really gives me great ideas for transferring my drawings to be painted. :-)
By the way, I am eagerly watching the mail for my copy of your tarot deck to arrive! I've watched you create this over the years and am SO excited it is finally released! It is sure to be the most beautiful deck I have ever read with... thank you!
You're very welcome!
ReplyDeleteHi Stephanie,
ReplyDeleteAs always, your work is awe inspiring. I love that you share the progress as well. Can't wait to see the painting as it progresses.
You're welcome Rosanna!
ReplyDeletefantastic tips Stephanie never tried with printing out the sketch and then transferring, i recently got sara graphite transfer paper works great on white paper but not so on tinted color paper i have a hard time transferring sketches to colored paper.
ReplyDelete